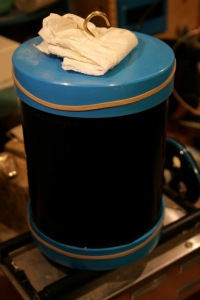
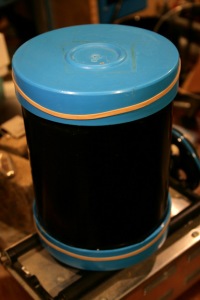
Due to my laziness and general engineers “there must be a tool for that, and why haven’t I got one” some time ago I bought a barrelling machine to do the bulk of my polishing. It is one of these kits and gives you most of what you need to get stuff polished, however, I found it less than perfect out of the box.
The main points I didnt like were the lack of traction twixt the rollers and the barrel and the fact that the nice airtight seal between the barrel and the lid made it quite hard to get them on and off.
The solution to the first problem; Rubber Bands!
The solution to the second problem; drill a hole in it!
Look:
When everything is dry then the barrel will rotate quite happily, but when a tiny bit of moisture gets on the rollers, then one end looses traction and the other slips off and your barrel goes skidding across the worktop and off onto the floor. As this thing uses water it is not uncomon for it get damp when you are filling/emptying it so this is a bit of a design flaw. To help alleviate this a pair of post office standard rubber bands of the type dropped by ones local postie as he does his rounds are very good for getting a grip on the rollers however there are still issues with this. Firstly, they don’t like large quantities of water and will still slip if there is a leak or a stray drop around and secondly, they will wear out after a few hours of use (but hey – the postman will probably leave you some on your doorstep). My next step for this will be to find a better material to use, like self amalgamating tape perhaps…, and to make a couple of arms to catch any escaping barrels (you may notice that some other designs of machine a cavity the barrel can’t get out of easily) or rebuild it with the rollers further apart so the CoG of the barrel is lower and therefore needs to be lifted further to escape.
For the other problem I found that putting the lids on and getting them off was a right pain as the water-tightness of the barrel was just a hindrance. The first solution was to drill a 0.5mm hole in the centre of one end cap (the one I would always take off) and not fill it more than half full. This doesn’t not work because the foam created by the tumbling process just resulted in water getting out though the hole. since there wasn’t a lot of water getting out I taped a bit of fabric over the hole to absorb this moisture. This worked ok but after a long period of use the cloth would get saturated and need replacing. The solution I am using at the moment is to screw a screw (well, cup hook since it is easer to undo and do up by hand) into the hole I made so that it fills most of the hole while in use but can be removed before putting on to taking the lid off. Just to catch any further drips, I put the screw through a piece of kitchen towel, so any time it gets to wet I can simply replace it.
After all that I can chuck things in the tumbler for a couple of hours and they come out all nice and sparkley, and what’s best, No work on my part, I can keep making new things.


